Your self-capture guide, video or photos
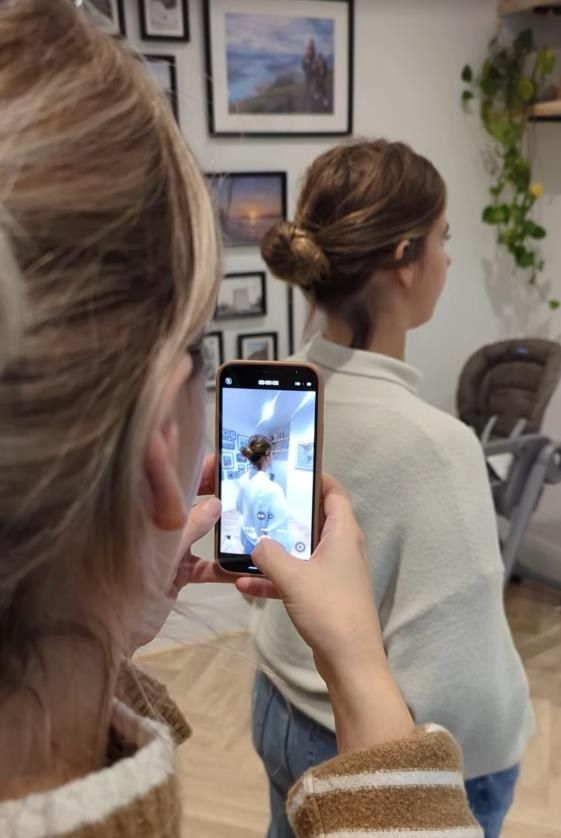
To begin with, we advise that you create a space that feels safe, calm and comfortable for you. We want capturing this special moment to be a relaxed experience, and for you to feel serene and fully prepared. This guide shows you how to set up your space, prepare your camera and position yourself comfortably. Following these few steps gives the best possible result for your sculpture, while keeping the process smooth and enjoyable.
As you work through the steps, take your time. This gives the clearest, most accurate capture. There is a quick checklist at the end of each step.
Download this guide as a PDF to keep on your phone.
Video or photos?
You can send us either a video or a set of photos. Both work well, so choose whichever you and your helper find easiest. The preparation is the same for both, and the steps below tell you where they differ.
You will need someone to help you. You stay still while they move the camera around you.
Preparing your room
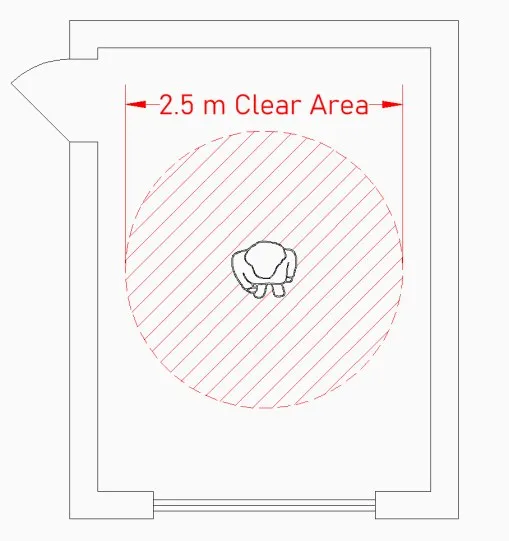
Choose a room with good lighting and plenty of space. We recommend a clear area of around 2.5 by 2.5 metres. Make sure the space is free of trip hazards like wires. The ideal time is during the day, with a window letting in natural light.
Quick checklist
- A clear space of about 2.5 by 2.5 metres
- Good lighting, ideally daylight from a window
- Wires and trip hazards cleared away
Getting your camera ready
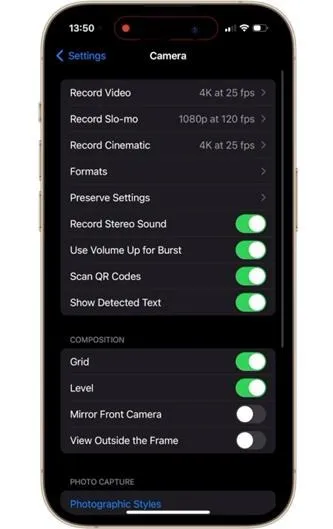
Please use the highest-quality phone or camera available. Better quality greatly reduces the chance of the model failing. In your camera settings, choose the highest possible resolution and turn on automatic focus.
For video: if your camera can film in H.264/AVC format, use it, and turn off video stabilisation.
For photos: turn off the flash and portrait mode, and do not zoom.
You may need to go into your phone or camera settings to change these. These guides show you where to find them:
Quick checklist
- Best camera available
- Highest resolution
- Automatic focus on
- Video: H.264/AVC format if available, stabilisation off
- Photos: flash off, portrait mode off, no zoom
- Double check the settings before you start
Getting yourself prepared
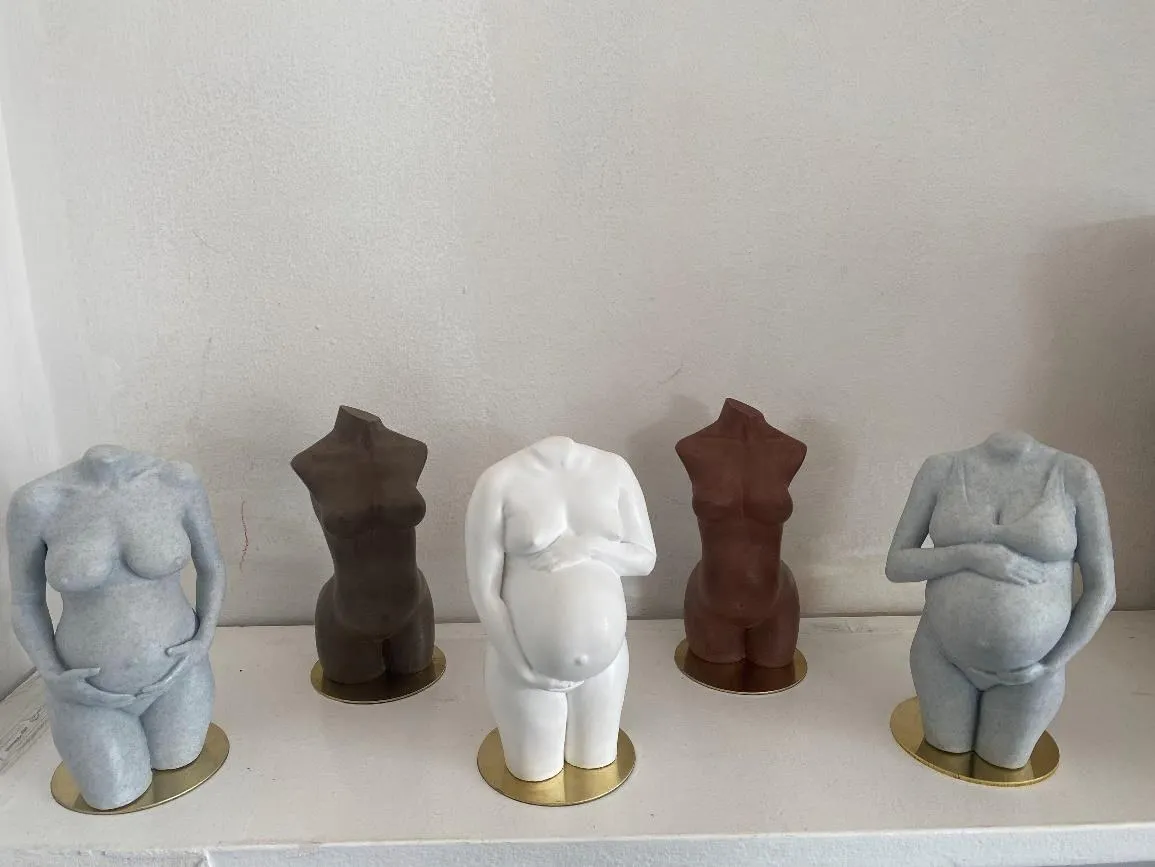
Before you start, think carefully about your pose. You will need to hold your position, as still as possible, for up to five minutes. Crossing your legs naturally arches your lower back, which can enhance definition. If you would rather not stand like that, keep your legs firmly pressed together with no gap between your thighs. Practise the pose beforehand to find what feels comfortable and looks best to you.
Your arms and hands can be part of the pose or held away from your body. The choice is yours. If you choose hands away, bring your arms up and pull your shoulder blades back. This lifts your chest and lengthens your torso.
If you have long hair, tie it up so it does not cover your neck or back. If you are wearing clothing, choose a bright colour like white rather than dark shades. Clothing cannot be removed digitally from the model, so only wear what you are certain you want on your sculpture.
Quick checklist
- Choose a comfortable pose
- Practise it to check you can hold it
- No gap between your thighs
- Long hair tied up
- Bright clothing, not black
Capturing the main shape
This is the same whether you are filming or taking photos. Your helper stands about 60cm away, holding the phone upright (portrait) without zooming. Make sure the settings from “Getting your camera ready” are on.
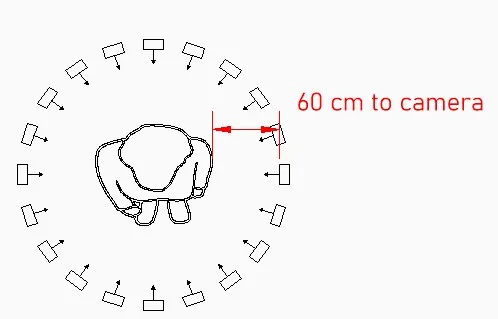
It is crucial that you stay perfectly still and keep your breathing calm. Any movement, laughter or shifting means starting again from the beginning.
Your helper works from knee level up to your chin in five levels, keeping the camera centred on you, moving slowly around you clockwise. Start and finish facing you. Pay extra attention to the side views near your arms, as these areas are the hardest to get right.
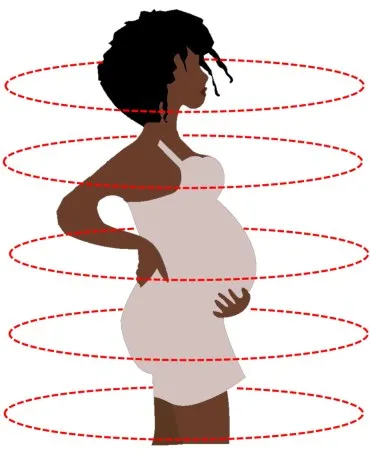
If you are filming: film each level for around 20 seconds, moving slowly and smoothly, as one continuous video. This is Film 1.
If you are taking photos: take a photo every small step as you move around, so that each photo overlaps the one before by most of the picture. Around 25 to 40 photos per level works well, giving 100 to 200 photos in total. Keep the phone steady for each photo so none are blurred.
Quick checklist
- Helper stands 60cm away
- Phone held upright, no zoom
- Settings checked
- Stay still and breathe calmly throughout
- Five levels, knees to chin
- Camera centred on you the whole time
- Start and finish facing you
- Video: about 20 seconds per level
- Photos: about 25 to 40 per level, each overlapping the last
- Move clockwise and take extra care with the side views
- If you move, start again
Capturing the close-ups
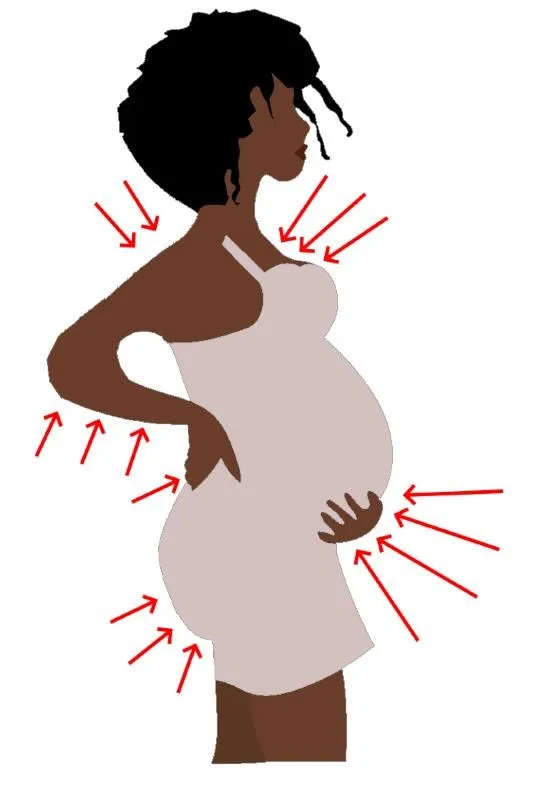
Detailed areas that are not captured straight on need a second set. Your helper stays about 60cm away and captures each area from several angles, moving slightly to film or photograph from above and below. When one area is done, move slowly to the next. If you are filming, this is Film 2.
Quick checklist
- Detail areas captured from about 60cm
- Several angles for each area, including from above and below
- Focus on these areas:
- Hands
- Lower back and underside of the bottom
- Underside and top of the arms
- Tops of the shoulders
- Chest area (top of the breasts)
- Nipples (if posing naturally)
Mum and baby sculptures
You can also use this guide to capture a sculpture of you holding your baby. Your baby needs to be asleep and completely still the whole time. If your baby moves, even slightly, the sculpture will not work, so wait for a good deep sleep before you start.
Hold your baby securely in a position you can keep comfortably for a few minutes, and follow the same steps as above. If your baby wakes or starts to move, stop and try again another time.
Quick checklist
- Baby asleep and completely still
- A secure, comfortable hold you can keep for a few minutes
- Same levels and close-ups as above
- Stop and start again if your baby moves
Sending us your video or photos
Once you are happy, send us everything: both films, or all of your photos including the close-ups. We need them at full resolution, so please do not use WhatsApp, which compresses files. Send a share link instead, using the steps below.
Email your link to enquiry@sculpt3d.co.uk with your name in the subject line. Your images are treated with complete confidentiality and are never shared.
iPhone
- Open Photos. Select the videos or photos you want to send.
- Create an iCloud link. Tap the Share icon (a square with an arrow) and choose Copy iCloud Link.
- Wait for the link. A message saying “Preparing…” appears briefly. When it is done, the link is copied automatically.
- Paste and send. Start a new email to enquiry@sculpt3d.co.uk, press and hold in the message area, choose Paste and send.
Android
- Open Google Photos. Select the videos or photos you want to send.
- Create a link. Tap the Share icon and choose Create link.
- Wait for the link. Google Photos briefly shows “Creating link…”. When it is ready, the link is copied automatically.
- Paste and send. Start a new email to enquiry@sculpt3d.co.uk, press and hold in the message area, choose Paste and send.
What happens next
Suzie checks everything you send to make sure we have what we need for a great sculpture. If anything needs retaking, she will let you know and talk you through it. Once your video or photos are approved, we start on your digital sculpture and send you a preview to approve before anything is printed.